1
Is PTE Academic right for you?
Before booking, confirm that PTE Academic is accepted by the institution(s) you are applying to. Check pearsonpte.com or contact the institution directly.


About the test
Pearson Test of English Academic (PTE Academic) is a fully computer-based English proficiency test used by universities, professional bodies and government agencies in 49+ countries to make decisions about study, work and visa applications.
Because every response is scored by AI, results are impartial and consistent — and they arrive in your inbox typically within 2 working days. Test centres operate in over fifty countries with a simple online booking process.
PTE Academic uses integrated tasks, which means you'll often combine two skills at once (Reading + Writing or Listening + Speaking) to mirror the way English is actually used in academic and professional life — for example, summarising a written passage or retelling a recorded lecture.
Your detailed score report breaks performance down by skill against the Global Scale of English (GSE), which aligns with the Common European Framework of Reference (CEFR) — so you know exactly which areas to improve.
How the test works
PTE Academic runs for approximately two hours at any of Pearson's authorised test centres around the world. The test has three parts — Speaking & Writing, Reading, and Listening — and contains 22 different scored task types plus one unscored introduction.
You will complete each task type a number of times. Tasks have memorable names (e.g. Retell Lecture, Repeat Sentence, Read Aloud) so it's easy to identify and remember what each one expects you to do.
Topics are drawn from real academic disciplines — Arts, Humanities, Sciences and Social Sciences. You don't need expert knowledge of any topic; you just need solid academic English to understand the prompt and respond clearly.
Most tasks are scored entirely by Pearson's automated scoring system, trained on the responses of thousands of test takers to produce consistent, objective marks. For some question types a human PTE expert performs additional checks to ensure the response is original and relevant — pronunciation and oral fluency, however, are always scored only by AI to remove human bias.
Every test taker walks through these eight steps — from deciding whether PTE is right for them, to opening the result email. Steps 1–5 are preparation; steps 6–8 are action.
Before booking, confirm that PTE Academic is accepted by the institution(s) you are applying to. Check pearsonpte.com or contact the institution directly.
Find out the application deadlines for your chosen institutions and work backwards so you know exactly how much preparation time you have.
Create a My PTE account at pearsonpte.com and book any day of the week. Last-minute bookings with 24 hours' notice are sometimes possible.
Before you start preparing:
Choose the path that fits your timeline.
In-depth study
If you have a longer runway, work through every task type, study the strategies in detail, and use the question bank to drill weaknesses systematically.
Fast-track preparation
If you have only a few weeks, focus on familiarising yourself with each task type, watch common-mistakes videos, and target the specific skills you are losing marks on.
Use the Am I Ready? checklist and a Scored Practice Test to honestly judge whether you are at target score before exam day.
The test lasts approximately two hours. Arrive at the centre at least 30 minutes early to complete security and sign-in procedures.
Pearson notifies you by email when your scores are available — typically within two working days. Log in to your account to view scores and send them to institutions.

PTE Academic has three main parts: Speaking & Writing, Reading and Listening. The whole test is randomly generated by computer, so no two PTE tests are identical. You'll complete every one of the 22 scored task types — but the number of times each appears varies between tests.
Part 1
Part 2
Part 3
A complete map of the test structure — every part, every task type, how many of each appear, and the time allowed.
| Parts of test | Task type | Number of tasks | Time allowed |
|---|---|---|---|
| Part 1: Speaking & Writing | Personal Introduction | 1 (30 sec.) | 76–84 minutes |
| Read Aloud | 6–7 | ||
| Repeat Sentence | 10–12 | ||
| Describe Image | 5–6 | ||
| Retell Lecture | 2–3 | ||
| Answer Short Question | 5–6 | ||
| Summarize Group Discussion | 2–3 | ||
| Respond to a Situation | 2–3 | ||
| Summarize Written Text | 2 | ||
| Write Essay | 1 | ||
| Part 2: Reading | Fill in the Blanks (Dropdown) | 5–6 | 23–30 minutes |
| Multiple Choice, Multiple Answers | 2–3 | ||
| Reorder Paragraph | 2–3 | ||
| Fill in the Blanks (Drag and Drop) | 4–5 | ||
| Multiple Choice, Single Answer | 2–3 | ||
| Part 3: Listening | Summarize Spoken Text | 1 | 31–39 minutes |
| Multiple Choice, Multiple Answers | 2–3 | ||
| Fill in the Blanks (Type in) | 2–3 | ||
| Highlight Correct Summary | 2–3 | ||
| Multiple Choice, Single Answer | 2–3 | ||
| Select Missing Word | 1–2 | ||
| Highlight Incorrect Words | 2–3 | ||
| Write from Dictation | 3–4 |
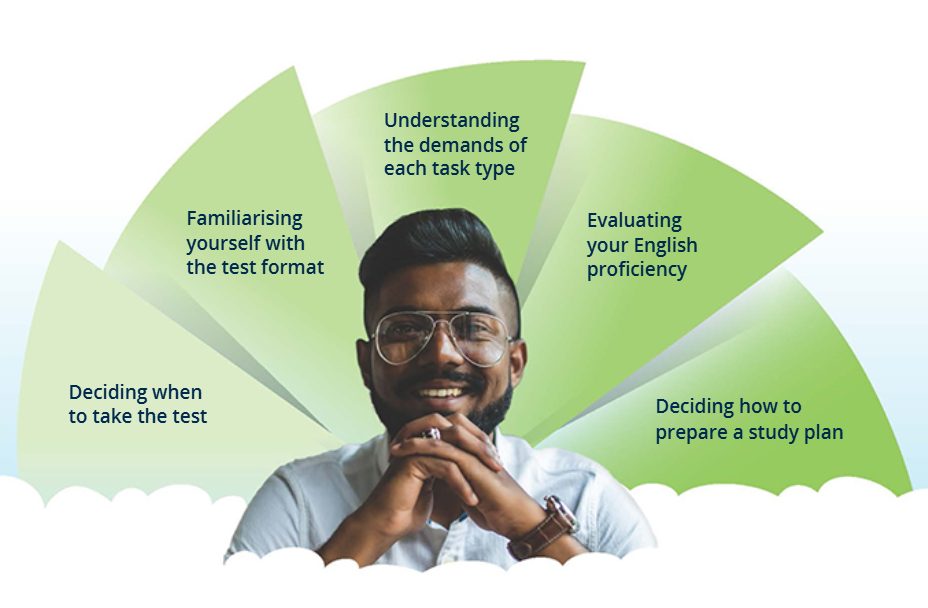
Depending on your needs, language level and familiarity with the test, your prep can include all of the following five things — different students need different mixes.
Deciding when to take the test
Start by deciding when you need your results. If you're applying somewhere specific, identify the institution(s), the target / minimum score they require, and the application deadline you must meet. Don't leave it too late — but also give yourself enough runway to genuinely improve before booking.
Familiarising yourself with the test
This guide builds familiarity with the PTE format and the test-taking experience. You will not perform at your best if you are surprised by the screen, the timer or what a question is actually asking.
Understanding the demands of each task type
PTE Academic has 22 task types and each one expects something different. Read the strategy explanation for every task and use the practice bank, so you know the skill being scored, what you'll see on screen, and where to find the play button, timer and recording status.
Before deciding the best way to study, identify your strengths and weaknesses across the sub-skills below. These are the building blocks PTE actually tests.
Some students prepare quickly with a short focused sprint; others need months to lift their proficiency. Pick the path that matches your runway.
Fast-track preparation
Reduced time before your test? Focus on the most important information — task familiarity, the question bank, and common-mistakes videos.
In-depth study
More time to prepare? Study every task type carefully and improve your overall academic English in parallel.
However long you have, work through these five steps. The middle column is for fast-track sprinters; the right column is for in-depth preparers.
Step
1
Fast-track
In-depth
Step
2
Fast-track
Identify your strengths and areas for improvement
In-depth
Identify your strengths and areas for improvement
Step
3
Fast-track
Pick out the most useful Digital Resources
In-depth
Use as many Digital Resources and tools as you can
Step
4
Fast-track
Create a study schedule
In-depth
Create a study schedule
Step
5
Fast-track
Re-assess
In-depth
Re-assess

A short Pearson VUE walkthrough — arrival, ID check, palm scan, locker, the booth and the test itself. Hit play and you'll feel like you've already done it once.
~ 5 minutes · No sign-in needed
Before going to the test centre
From the moment you walk through the door to the moment you sit down at your booth, here's exactly what happens — in order. Read it once and you'll feel like you've already done it.

You arrive
Step 1 of 6You arrive 30 minutes early and walk up to the Pearson reception desk.
The staff member greets you and asks for your photo ID — usually your passport. Hand it over with a smile. They will check that the name and details match exactly what you used when you booked online.
Heads up: If even one letter is different, you will not be allowed to sit the test. Always book using the exact name on your ID.

Then…
Step 2 of 6Reception then hands you a printed agreement to read carefully.
This document explains the rules of the test centre — what you must do, what you must not do, and what happens if you break the rules. Take your time. If anything is unclear, ask a staff member to explain it before you move on.
Heads up: Don't just skim — questions about phones, breaks and notes are answered here.
Then…
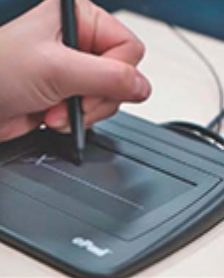
Step 3 of 6Once you understand the rules, you sign on a small electronic pad.
Your digital signature confirms that you agree to follow every rule in the test taker agreement. From this moment on, breaking those rules — for example, talking to other candidates or accessing your phone — can invalidate your entire test.
Heads up: Sign clearly, the same way you sign your passport.
Then…
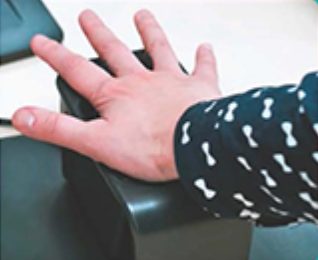
Step 4 of 6Now the biometric checks begin.
You'll place your palm on a small scanner and have your photograph taken. These two things together confirm that the person sitting the test is really you — and they're checked again every time you leave or re-enter the test room.
Heads up: Stay relaxed; the scan takes only seconds.

Then…
Step 5 of 6Before you can enter the test room, everything you brought goes into a locker.
Phones (switched off), smart watches, bags, wallets, hats, coats, food, drink bottles, books, notes — anything you brought stays in the locker. From here you walk to the test booth carrying only your ID and the locker key.
Heads up: Items NOT allowed in the room: phones, electronic devices, digital watches, food/drink, jewellery thicker than 1/4 inch, wallets, hats, coats, books, notes, and talking to other test takers.

You're ready
Step 6 of 6Finally, an administrator hands you your test-day toolkit.
You receive two pens and one erasable whiteboard, which you can use to take notes during the test. Walk calmly to your assigned booth — your computer, headset and microphone are already waiting for you.
Heads up: Don't write on the whiteboard until the test actually starts. If you fill it up mid-test, raise your hand and the administrator will swap it for a fresh one.
That's it — you're sitting at your computer with two pens, a whiteboard, headphones on. The test is about to start.
Do
Don't
PTE 101 walks you through all 22 task types interactively — with the real Pearson exam screen, sample answers, and a quick self-test quiz. Pair it with the Am I Ready? checklist to find your weak spots.
Visual guide adapted by PTE School from publicly available PTE Academic information for student use. Original Pearson assets are not reproduced here — image slots are placeholders for your branded photography.